

INTRODUCTION
Have you ever imagined being able to access websites without having to use a password and avoiding the stress of going through a forgotten password procedure just in case you lost your password? With the help of web 3.0, the future is already here.
Web3.0 offers far superior alternatives to the typical web 2.0 forget password clicks and social media logins, which have privacy implications. It is mostly about the user's wallet.
This article will build a simple react application template that requires you to be authenticated with MetaMask without any external library. And guess what? It will be mobile supportive too. MetaMask is a browser plugin and app that describes itself as a cryptocurrency wallet and a portal to blockchain applications.
Are you excited to start?
PREREQUISITES
As a prerequisite:
- Download the MetaMask wallet extension
- Little familiarity with React as this article is not about to react.
So, shall we?
HOW TO?
we will follow the following simple steps to enable the workflow on the desktop
FIRST STEP - Create react app
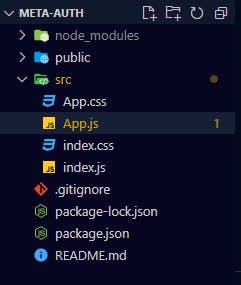
First, let's start our react-app and clean up the folder/files as shown below.
npx create-react-app meta-auth
SECOND STEP - UI setup
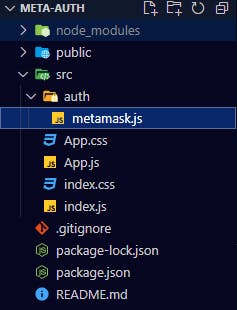
Secondly, let's create a folder called components and inside create a file metamask.js (see image below).
Now let's create our code UI, a very simple one.
import React, { useEffect, useState } from 'react'

const Metamask = () => {
  // set states to hold wallet account details
  const [userAccount, setUserAccount] = useState()

  return return (
    <>
      <div className='wrapper'>
        <img src={img} alt="" />
        <div className="connect">
          {
            userAccount ? <div className='text-connect'>
              <span>{userAccount.substring(0, 5)}...{userAccount.substring(userAccount.length - 5)} </span>
            </div>  : <button className='btn' onClick={() => connectWallet()}>connect wallet</button>
          }
        </div>
      </div>
      {
          userAccount ? <div className="content">
            CONGRATULATION YOU HAVE SUCCESSFULLY LOGIN IN
          </div> : <p className="text">connect your wallet</p>
        }
    </>
  )
}

export default Metamask
Here is the simple CSS
body {
  margin: 0;
  font-family: -apple-system, BlinkMacSystemFont, 'Segoe UI', 'Roboto', 'Oxygen',
    'Ubuntu', 'Cantarell', 'Fira Sans', 'Droid Sans', 'Helvetica Neue',
    sans-serif;
  -webkit-font-smoothing: antialiased;
  -moz-osx-font-smoothing: grayscale;
  background-color: rgb(236, 234, 228);
}
img{
  width: 20%;
  height: 20%;
  border-radius: 5%;
  margin-bottom: 10px;
}
.wrapper{
  margin-top: 10em;
  display: flex;
  flex-direction: column;
  justify-content: center;
  align-items: center;
  align-content: center;
}
.btn{
  background-color: #2172E5;
  margin: 2px 0;
  border-radius: 5px;
  border: 1px solid transparent;
  padding: 6px 8px;
  text-align: center;
  color: white;
}
.text-connect{
  color: #21e531;
  font-weight: bold;
}
.text{
  color:  red;
  margin-top: 20px;
  text-align: center;
}

.content{
  color:  green;
  margin-top: 20px;
  text-align: center;
  font-weight: bolder;
  border: 1px solid black;
  padding: 10px;
}
From the UI above, we have a state for userAccount, and this is to keep track of our user's address wallet. We used the userAccount to check if the user is login in or not while displaying the right content or page as the case may be. If no user, it's shows the connect wallet button. This button called the connectWallet() function that we would be creating next. This is the real deal. So let's get started.
THIRD STEPS - Logic and Function Implementation
Thirdly, our UI is set, but we need to define the connectWallet(). This function is what will help us connect with the MetaMask extension or app we have downloaded earlier.
 const [userAccount, setUserAccount] = useState()

  //  initialize and check if the Ethereum blockchain is defined, the assign
  let eth

  if (typeof window !== 'undefined'){
    eth = window.ethereum
  }

  const connectWallet =  async (metamask = eth)=>{
    try {
      // check if metamask is installed
      if(!metamask){
        return alert('please install metamask to proceed')
      }
      // access the account
      const acc = await metamask.request({method:'eth_requestAccounts'})
      setUserAccount(acc[0])
      window.location.reload()
    } catch (error) {
      console.log(error);
      throw new Error('No ethereum object found')
    }
  }
Just below the userAccount state, we defined our connectWallet() function. First, we initialized a variable, checked if the browser window is not 'undefined', and assigned the window. Ethereum objects to the defined variable 'eth'.
Quick note:
When we installed the metamask extension, we had access to the window.Ethereum object. Our application uses the Ethereum object to interact with MetaMask and its private key management tools for the user's public Ethereum address.
Next on our function, we passed in the eth variable as the default argument for the parameter variable. If you have not install MetaMask, you get an alert "Please install metamask to proceed" else we request the metamask method "eth_requestAccounts" and assign to the variable "acc" (This return an array granted account, but we are concern with the first, hence acc[0] )
Finally, we update our userAccount states with the setUserAccount(acc[0]) and reload our window automatically.
Definitely, we catch any other errors and throw them as per async/await function.
Guess what? Our MetaMask authentication is ready now, but let's account for whether a user is connected or not when they enter our site the first time or revisit.
const checkWalletConnect = async (metamask =eth)=>{
    try {
      // check if metamask is installed
      if(!metamask){
        return alert('please install metamask to continue')
      }
      const acc = await metamask.request({method: 'eth_accounts'})
      if (acc.length){
        setUserAccount(acc[0])
      }
    } catch (error) {
      console.log(error);
      throw new Error('No Ethereum object')
    }
  }

  useEffect(()=>{
    checkWalletConnect()
  },[])
The checkWalletConnect similarly checks if metamask is installed and requests the "eth_accounts" method from metamask, then updates the userAccount.
To make it checked at every first visit instance of our site, we need to call it on the useEffect react hooks.
FINAL STEP - Test
Now you can test out the application on your laptop.

MOBILE DEVICE SUPPORT
First to check if the user is on mobile device
const isMobile = ()=>{
    return 'ontouchstart' in window || 'onmsgesturechange' in window
  }
The code above help checks if user is on mobile.
Mobile shortcomings
There are no extensions on mobile browsers, unlike on desktop browsers, so making a login with metamask without an external library like moralis will require a deep links. While this is one option, there are other possible options. The MetaMask app can be launched on the user's mobile device through a deep link (if the user does not have the MetaMask installed, it will open the link to install in the AppStore).
MetaMask's deep link generator tool may be used to build deep links for various use cases, including "Open a dapp" and "Payment request." The deep link "Open a dapp" will be required. We don't even need to utilize the deep link generation tool because the deep link format is relatively easy. The deep connection should look like this: metamask.app.link/dapp/[YOUR APP URL], where YOUR DAPP URL is the address of your website.
Therefore, we add the following to our code in the checkWallectConnect() function.
if (isMobile()){
        await connectWallet(eth)
   }
The below code activates the mobile support.
  if(isMobile()){
    const dappUrl = 'web3-metamask-auth.netlify.app'
    const metamaskAppDeepLink = "https://metamask.app.link/dapp/" + dappUrl
    return (
      <a href={metamaskAppDeepLink}>
        <button className="btn">
          connect wallet
        </button>
      </a>
    )
  }
Thanks for reading!!!
View full code here Github
Live link %[web3-metamask-auth.netlify.app/]